Just today, a box has been delivered in your house here in Philadelphia, Yes, the part I ordered from one of auto parts store on the internet. The coil spring isolator of my Silverado was damaged and hence I needed to replace it. Not a tough job. Actually it would only take 1 and a half hour. First off, here are the things you should have:
Floor Jack
2 Jack Stands
5/8" Combination Wrench
19mm Socket and Socket Wrench
3 6" 2"x4" Blocks
2 8" 2"x4" Blocks
Large Hydraulic Jack
Small Hydraulic Jack
Tire Iron or Impact Wrench with 3/4" Socket
2 Jack Stands
5/8" Combination Wrench
19mm Socket and Socket Wrench
3 6" 2"x4" Blocks
2 8" 2"x4" Blocks
Large Hydraulic Jack
Small Hydraulic Jack
Tire Iron or Impact Wrench with 3/4" Socket
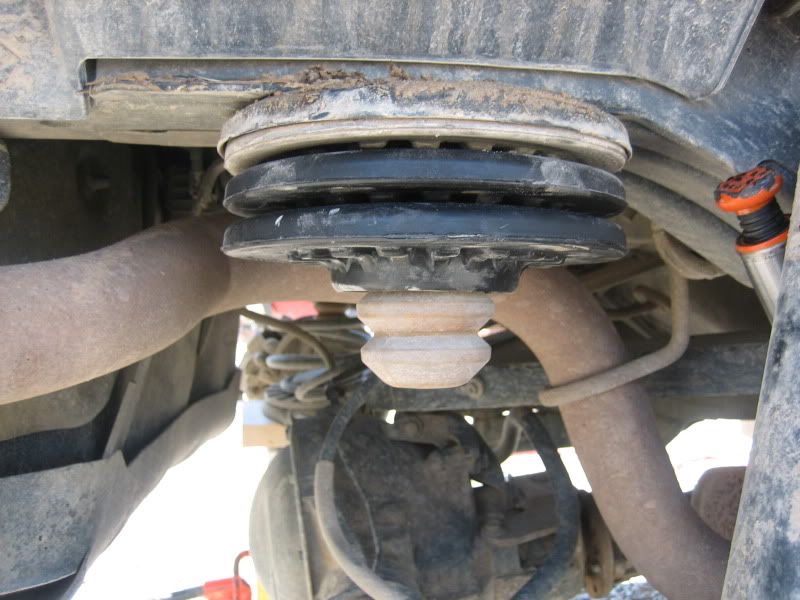
I recommend getting a Westar Coil Spring Isolator because the quality of this brand is really different from others.
- You can start the installation by unpacking the box and organizing the things that you will need such as the above mentioned.
- Next step is to park your car in a safe place, much better if it is on your own garage. Then, start removing the wheel by placing a jack underneath. Now you can remove the bearings as well as the wheels. Start by turning the jack higher until it reached the right height. Once remove, install the coil isolator and make sure they are properly fitted.
- Once done, you can start lowering the jack and test if it is ok. However you can consult the local mechanic and ask how to auto repair.
No comments:
Post a Comment